Guest Groups
Guest Groups make it easy to create a new poll including the same group of guest you’ve invited before. You can store one Guest Group with the basic/free plan, but an unlimited number with a Premium membership.
1. Save the guests when you add them to your poll
-
1
Add Guests to Poll
Add the guests to the poll like you normally would.
-
2
Save As Guest Group
Before you hit "Send", click on the "save this guest list as a guest group" link. The dialog that appears will ask you for a group name. Add a name and save. You have now saved your guest list as a guest group. Then hit "Send" to invite your guest to vote in the poll.
2. Save the guest list that is already in one of your polls

-
1
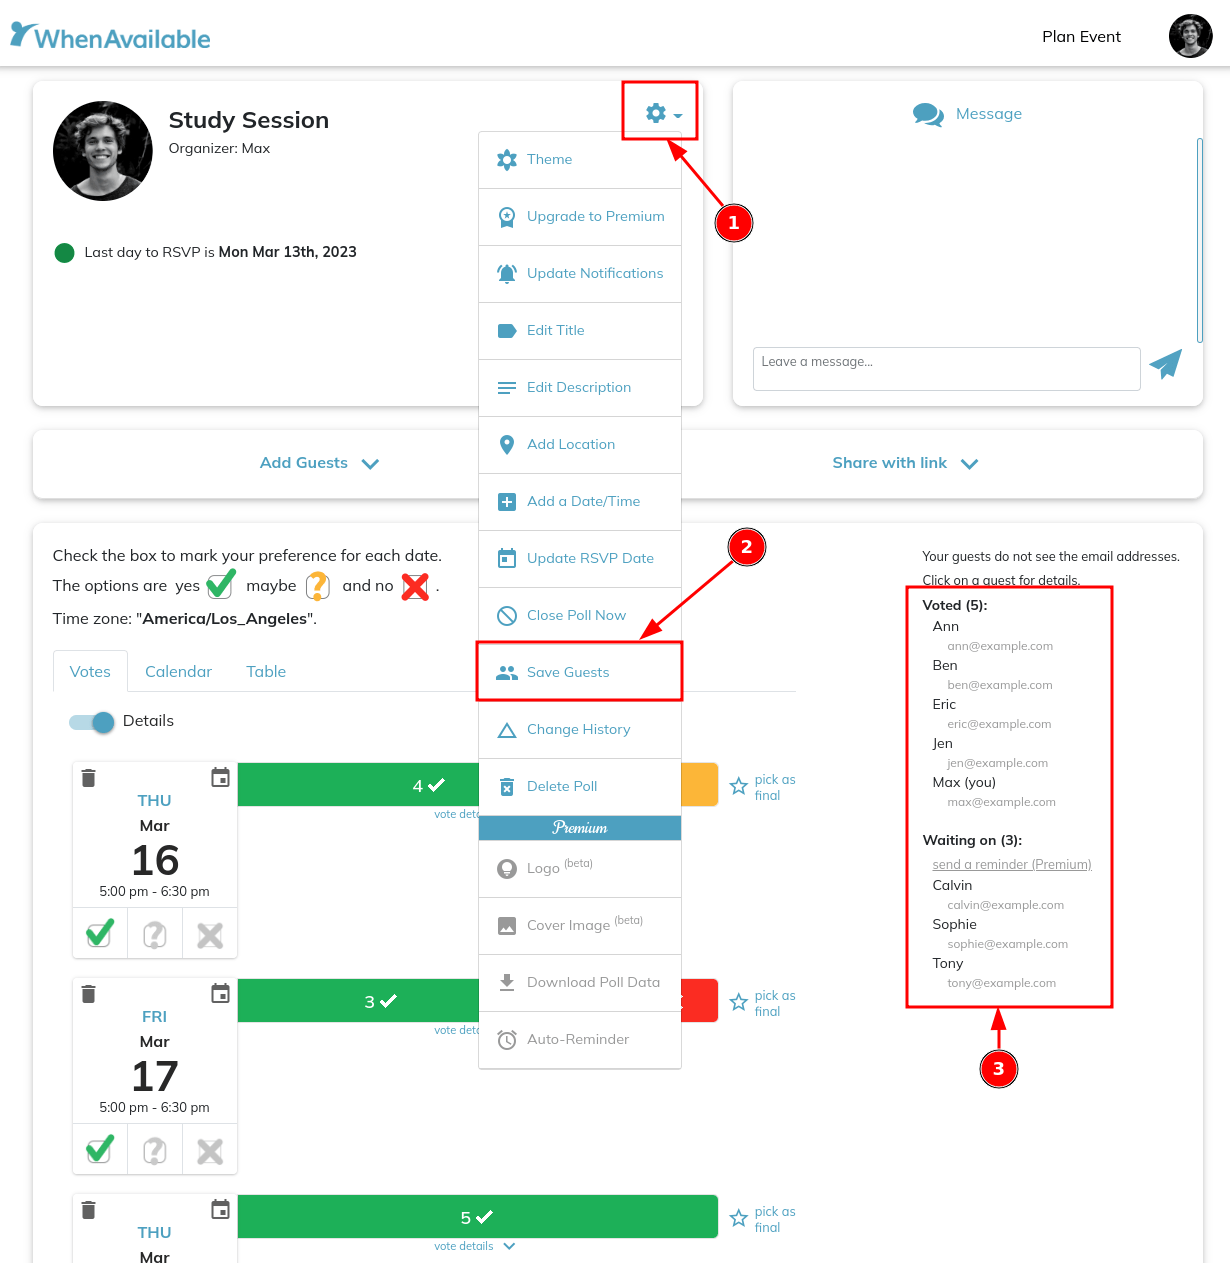
Click on the settings icon settings
From the drop down options, select "Save Guests". A dialog will appear for you to add a name for your guest group. When ready, hit the "Save Group" button. All guests with an email address will be saved to the new group.
-
2
Select Save Guests
Save Guests will bring up a dialog so you can name the Guest Group.
-
3
Guest list becomes a Guest Group
All guests in the poll (provided they have an email address) will be saved to the new guest group.
3. Create a Group in your Hub

-
1
Navigate to your Hub
When you are signed in you can navigate to your hub from the top navigation menu
-
2
Select "Guest Groups"
From the left navigation menu select "Guest Groups"
-
3
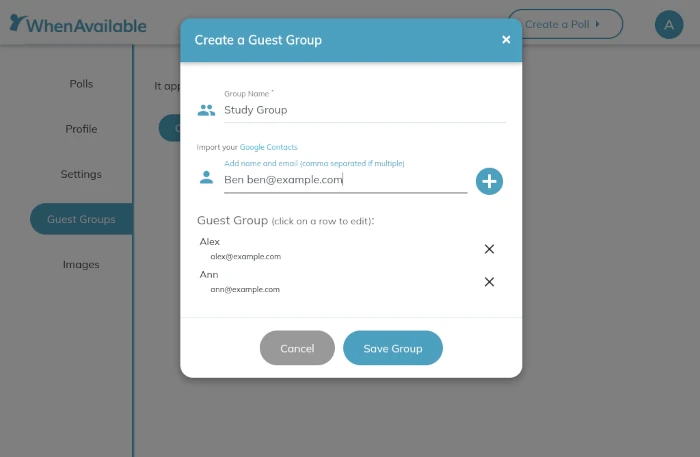
Create a Group
Click on the "Create a Group" button. In the dialog that appears enter a name for the guest group and then the guests’ name and email. If you import your Google Contacts, start typing the name and you’ll see a drop-down where you can pick your contact. You can also copy/paste a list of names and email addresses if you have one. After you’ve added your guests, hit "Save Group". You can add and remove guests from your guest group or delete your guest group at any time.