How to Create a Poll
Whether you are picking a date, asking a question, or both—here is how to build your first poll.
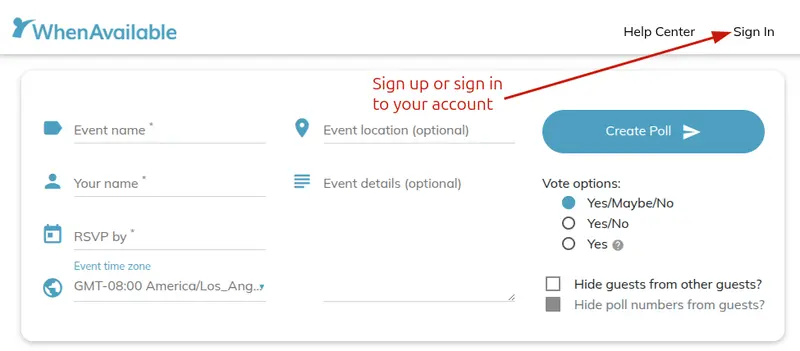
1. Get Started & Sign In
Enter the Create Poll page. You must be signed in to save and manage your polls.
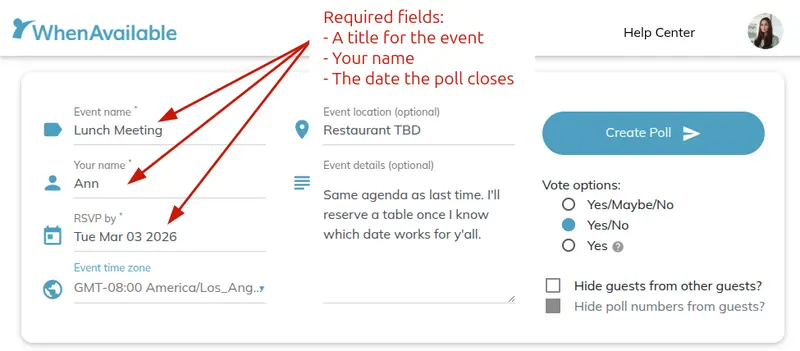
2. Enter Event Details
Fill in the three required fields:
- The Title: Name your event (e.g., "Lunch Meeting").
- Organizer Name: How guests will see you.
- Poll Deadline: When voting will close.
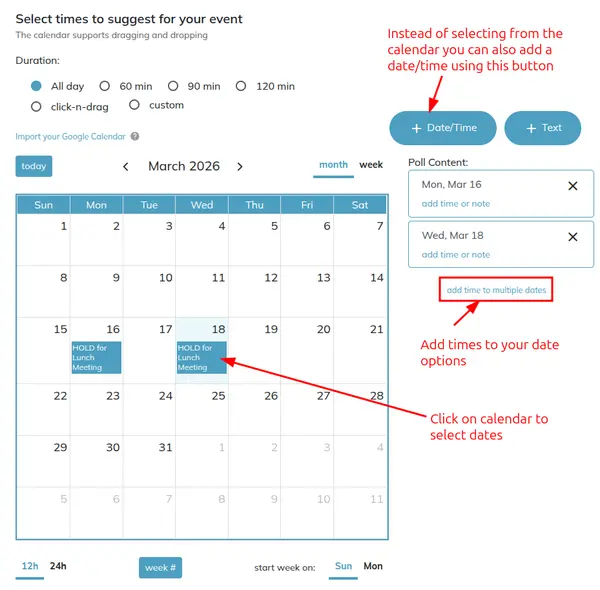
3. Add Dates
Click directly on the calendar to select date options. You can click and drag to cover a range, like a full weekend.
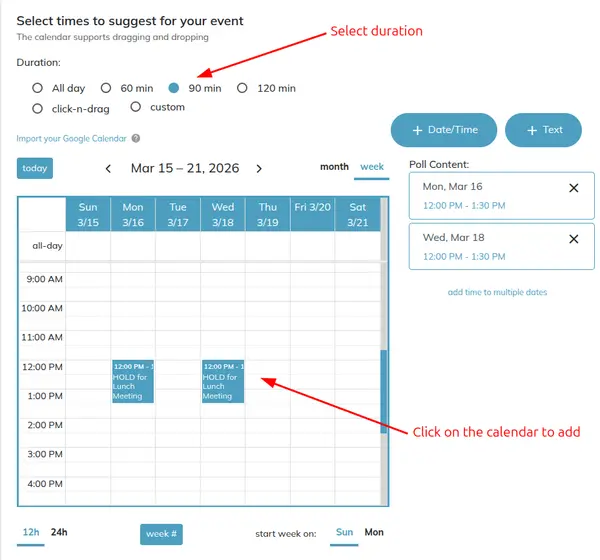
4. Add Times
Select a duration (e.g., 90 min) and click the calendar to add time slots. The calendar will automatically switch views to show you the best detail for your selection.
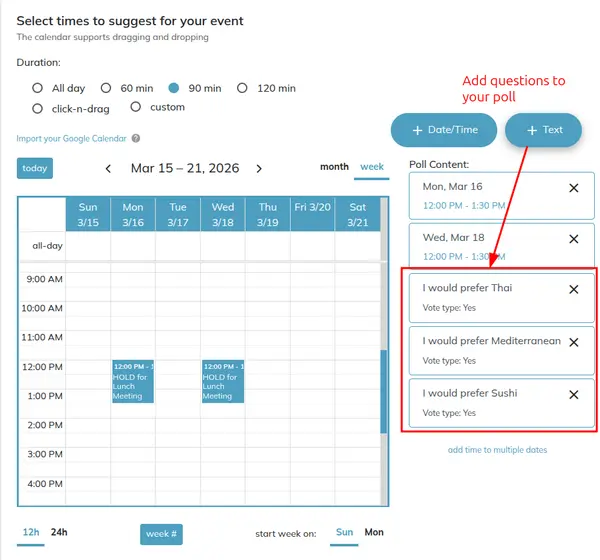
5. Add Custom Questions
Collect extra info like food preferences or transport needs.
Examples: "Can you bring a snack?" or "Do you need a ride?"
Finishing Touches
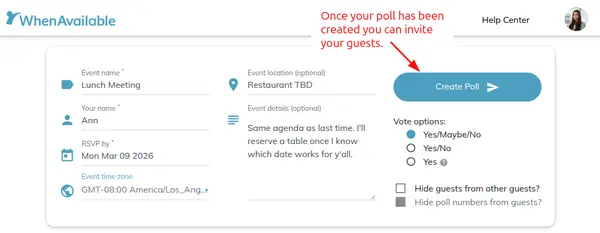
6. Launch Your Poll
Review your content and hit the Create Poll button. You're ready to start inviting guests!
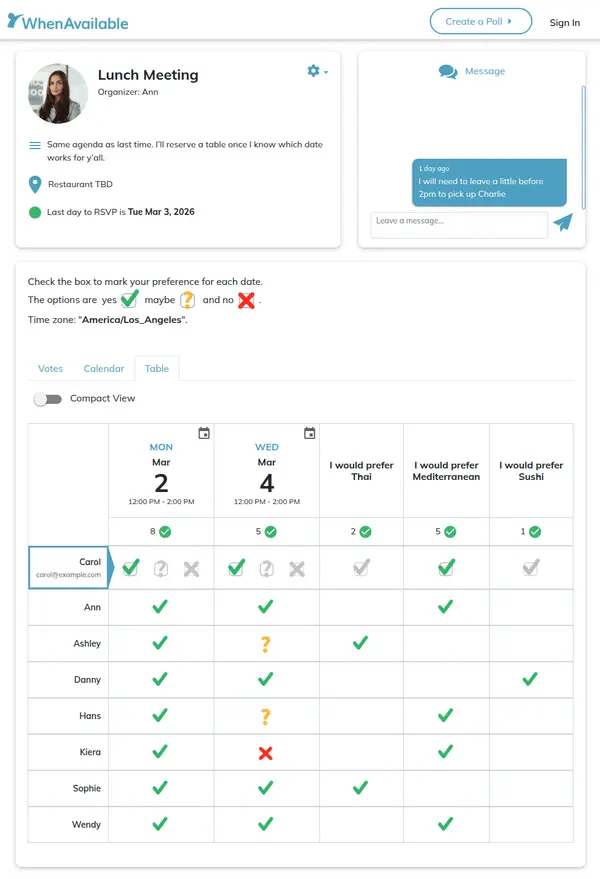
The Final Result
Once shared, your guests will see a clean, professional poll like this: